- Home » Editorial » Hydraulics
Hydrotechnik UK extends calibration department

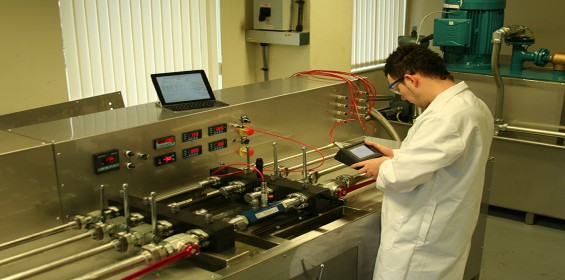
Hydrotechnik UK has unveiled a major new addition to its existing calibration department. Its brand new £100,000+ flow test rig enables the company to offer full in-house flow meter recalibrations traceable to National Standards.
The new rig runs on oil, a major advantage for its hydraulic, lube and diesel use customers. The oil’s viscosity is adjusted from 15 to 100cst with 32cst being the norm. A 5-point calibration is standard although 10 or more points throughout the measuring range can be performed on request. The rig has a flow range of 0.05L/min up to 700L/min and has 2 master flow meters giving a maximum uncertainty of +/-0.5%
Hydrotechnik has created a dedicated in-house laboratory room which caters for flow, pressure, temperature and oil particulate sensors as well as instrumentation calibrations, re-calibrations and repairs. Pressure sensor calibration is from 0 to 1200 bar and temperature from -50 to 200degC¬, all traceable to UKAS standards.
Michael Sharpe, calibration service manager at Hydrotechnik UK, and Andrew Biggs, technical director at UK Flowtechnik Ltd., have a combined 30 years’ experience calibrating hydraulic test and measurement equipment. They provide an insight into the importance of an effective re-calibration regime:
What is calibration?
Calibration is a testing procedure used to make sure that the current tolerance, accuracy and functionality of a sensor such as pressure, flow and temperature sensors are within acceptable parameters.
Why is it so important?
Re-calibration is an important periodic procedure as it ensures that a given sensor is producing reliable, safe and trustworthy results traceable to a known National Standard.
How often should you calibrate?
As Biggs points out, that there is no one universal rule that dictates how often an instrument or sensor should be calibrated. There are, however, some broad factors that should be considered:
• If correctly used, a flowmeter with mechanical parts may be best calibrated on a on a time used basis as wear is the most significant attributor to changes in calibration.
• Electronic devices such as pressure or temperature sensors can also have electrical degradation, so a periodic calendar calibration may be more appropriate.
• The results of the calibration should always be compared with the previous set. If there has been no appreciable change then perhaps the calibration interval can be extended. Conversely, if there has been a significant change then look at how the sensor is used and/or a reduction in calibration interval to meet your needs.
• It is always worth considering calibration before a demanding measuring project; for example, in R&D when accuracy is paramount to ensure a product passes certain tests and regulations before it can go to market. A calibrated and trusted sensor can then be relied upon to provide accurate test results.
-
PPMA 2025
23 September, 2025, 9:30 - 25 September, 2025, 16:00
NEC, Birmingham UK -
Advanced Engineering Show 2025
29 October, 2025, 9:00 - 30 October, 2025, 16:00
NEC, Birmingham UK


